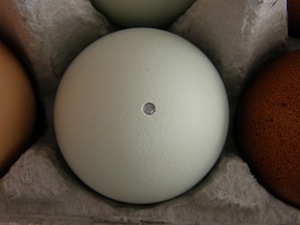
One little perfect hole. That’s all!
When I first wanted to learn how to blow an egg – the dark brown speckled eggs my Black Copper Maran princesses are laying are too gorgeous not to decorate with – I went to the great wide Internet for instructions. Whoa. On YouTube, there’s lots of people, speaking many different languages, sharing a multitude of strategies on how to blow an egg. I wasted the better part of a morning (like I frequently do) trying to find the best one.
I tried a needle and aspirater. Fail. I tried a drill bit and Dremel. Overkill, don’t ya think?
Then I ordered a Blas-Fix egg blowing kit on Amazon. It was $11 including shipping. And it was, well, ridiculously easy and kinda cool.
When I opened the box, I was totally skeptical. Two pieces, neither of which looked or felt very substantial. But I had ten eggs, a camera, and time on my hands. Ready, set go!
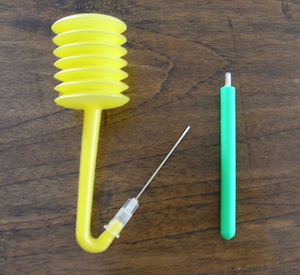
Drilling tool and hand pump with needle. I was, at this point, unconvinced. I was soon impressed. Both tools worked perfectly.
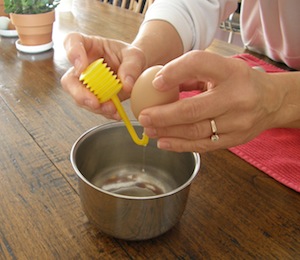
Put the tip of the drilling tool on the bottom of the egg. Twist back and forth. It takes a bit of pressure to get it going, but once it “grabs” and the hole starts it goes fast and easy. I blew the egg dust away from the hole while I was drilling.
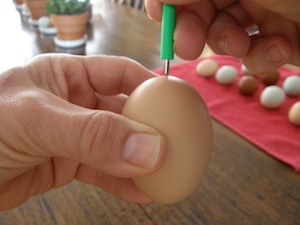
Finding the bottom of the egg was the hardest part!
Take a large needle (I found one from some failed craft project I started) and jab it up an down to break up the yolk inside.
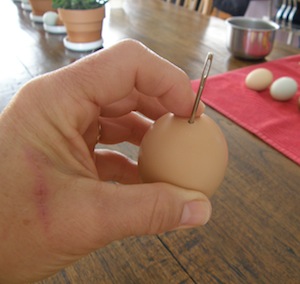
I jabbed about 15 seconds – scrambling the egg inside is important.
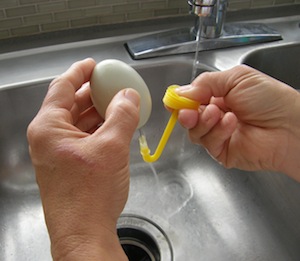
Turn the egg hole-side down over a bowl. Insert needle into egg. Put your finger over the hole on the top of the pump. Press pump over and over until all the egg is out.
Pump slowly. With confidence.
What to do with all those egg innards? Scramble with a fork, add bit of salt, scramble some more. Freeze. They’ll need to defrost in the refrigerator, so take them out of the freezer the day before you make french toast for the family.

Liquid gold.
Now to clean out the egg. Fill up the blower with water through the hole in the top.
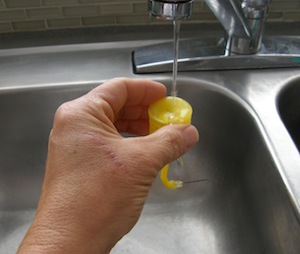
Nice scratch on the thumb. I obviously will never be a hand model.
Squeeze the water into the egg.
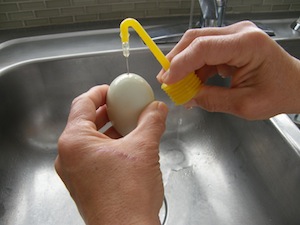
Shake, shake, shake!
Blow the water out. I did this process a few times until the water out of the egg ran clear.
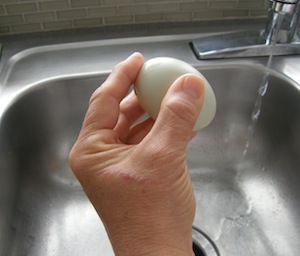
Dry, hole side down.
They seemed to stop dripping water after about two hours.
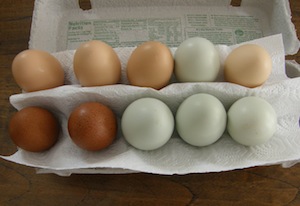
Voilà!

Pretty, aren’t they?
Out of the ten eggs I started with, only one broke. Perfect little holes on every one!
And what did I do with those beautiful eggs? Still working on that. Check back – I’ll post the final product when I’m done!
(Shared at Farmhouse Style Blog Hop, Homestead Barn Hop, Backyard Farming Connection Hop, You’re Gonna Love It Tuesday, Down Home Blog Hop, The Creative Homeacre Hop, Country Homemaker Hop, The HomeAcre Hop, Link Love Thursday, Farm Girl Friday Blog Fest and Farmgirl Friday Blog Hop!)

Sure is easy to get totally consumed in Computerland. Eggs look great and pretty impressive you only broke one! I haven’t tried this yet but bet I would break much more than that. Can’t wait to see what you’re making.
Have a great day
Jen
A View From A Brown Dog recently posted…Are you sure there’s no more…
No, it’s completely crazy how easy it is – if I can do it, anyone can do it 🙂 We’re getting more snow this weekend – it’ll be a great time to work on those crafty things!
They are…your way is really easy…I’ve done it other harder ways!
Linda
http://coloradofarmlife.wordpress.com
http://deltacountyhistoricalsociety.wordpress.com
Linda recently posted…The Way It Was Thursday—The Rancher That Calves Out on Our Place
I broke so many eggs using other methods – the only one happy about that was Keela the dog who got to eat them all!
Awesome! I’ve been wondering how to do this lately. I have some eggs from hens that have passed away and I want to preserve them. They’ve been in the fridge for a while and I think they are totally dried out by this point, but I’d like to save them if I can. I’ll have to try this out!
Tammy/Our Neck of the Woods recently posted…Spring Gardening
Hi use this kit as well, but one thing. That sharp needle you put on the end of the yellow bellows? That’s what you use to make your initial hold in the shell, then the green thing enlarges it to a perfect circle. Then you use the sharp needle to scramble the insides, no need to use a sewing needle.
Ah, there’s always more than one way to get the job done!
Cool! Thanks for sharing this on The Creative HomeAcre Hop! Hope to see you this Sunday at:
http://www.theselfsufficienthomeacre.com/2013/03/the-creative-homeacre-hop-7.html
Lisa Lynn recently posted…Cranberry-Orange Marmalade
Wow – that is an awesome tool. We blew eggs as kids often and I can remember many broken shells.
Gretchen recently posted…A Bit About Learning and Honey Extraction
Your eggs are absolutely beautiful! We don’t have chickens yet ~ they are due to arrive this summer but I look forward to having all the different shapes and colors of the eggs.
Thank you for sharing this at the HomeAcre Hop! Hope to see you again tomorrow evening: http://blackfoxhomestead.com/the-homeacre-hop/
~Jenny
Jenny recently posted…What I Have Learned About Windbreaks
You will love those chicks, Jenny! It’s hard to have a bad day when you’ve got chickens in the backyard.